Welcome!

This site is dedicated to my model railroad, the HO scale Virginia Midland Railroad. This layout comprises a 12X9 room with two levels. The upper level is complete and the lower level scenery has just begun.

I do a handful of train shows in the Virginia/Maryland region with Makin Tracks.
I also can help you find that freight car/locomotive or other hard to find item.

Email: virginiamidlandshops@gmail.com
You tube videos: http://www.youtube.com/user/Virginiamidlandrr/
Showing posts with label Soldering. Show all posts

Thursday, December 5, 2019

New wireless soldering iron: with 10% off coupon code!

I was contacted back in November by gentleman that liked my blog and was wondering if I'd do a review of soldering iron.  He was going to send my a free one to try if I'd do a review on it.  The soldering iron is not just an ordinary iron but a wireless one.  It is the Iso-Tip Quick Charge Cordless Soldering Iron Kit: Model #7700.  I didn't even know they made wireless ones and if they did, they'd be expensive.  So I got it from him very quickly and I actually had several soldering projects to do, mainly decoder installs.  All I can say is wireless is the way to go.  No more getting that cord caught on corners or knocking over things on your workbench.  It's hot within 10 seconds and cools off quickly.  Best of all, you don't have to worry about it getting left on.  The push button control works perfectly.  It comes with 2 soldering tips and you can order just about any type.

I highly recommend this soldering iron because it easy to use and definitely affordable. It would work even better on soldering track wires due to the cordless feature.  I actually have to use it on some new feeder wires on the layout real soon.  Glad I have this now.   I will never go back to a wired one again.

If interested, here is the website: www.iso-tip.com
Model #7700 @ $50.95
Use virginiamidland10 for 10% off your order.  Hurry because this offer ends December 31st!

The soldering iron on it's charger. The red push button is used to heat the iron.  Push and hold, it heats up.  Let go, it cools.
The red button rotates so turning it up and holding the button heats up the iron and the it cannot be pushed if it's not in the up position.

This is the basic tip it comes with.  Easily removable.  It also comes with another tip.

Saturday, October 5, 2013

Fall modeling is a go (sort of)

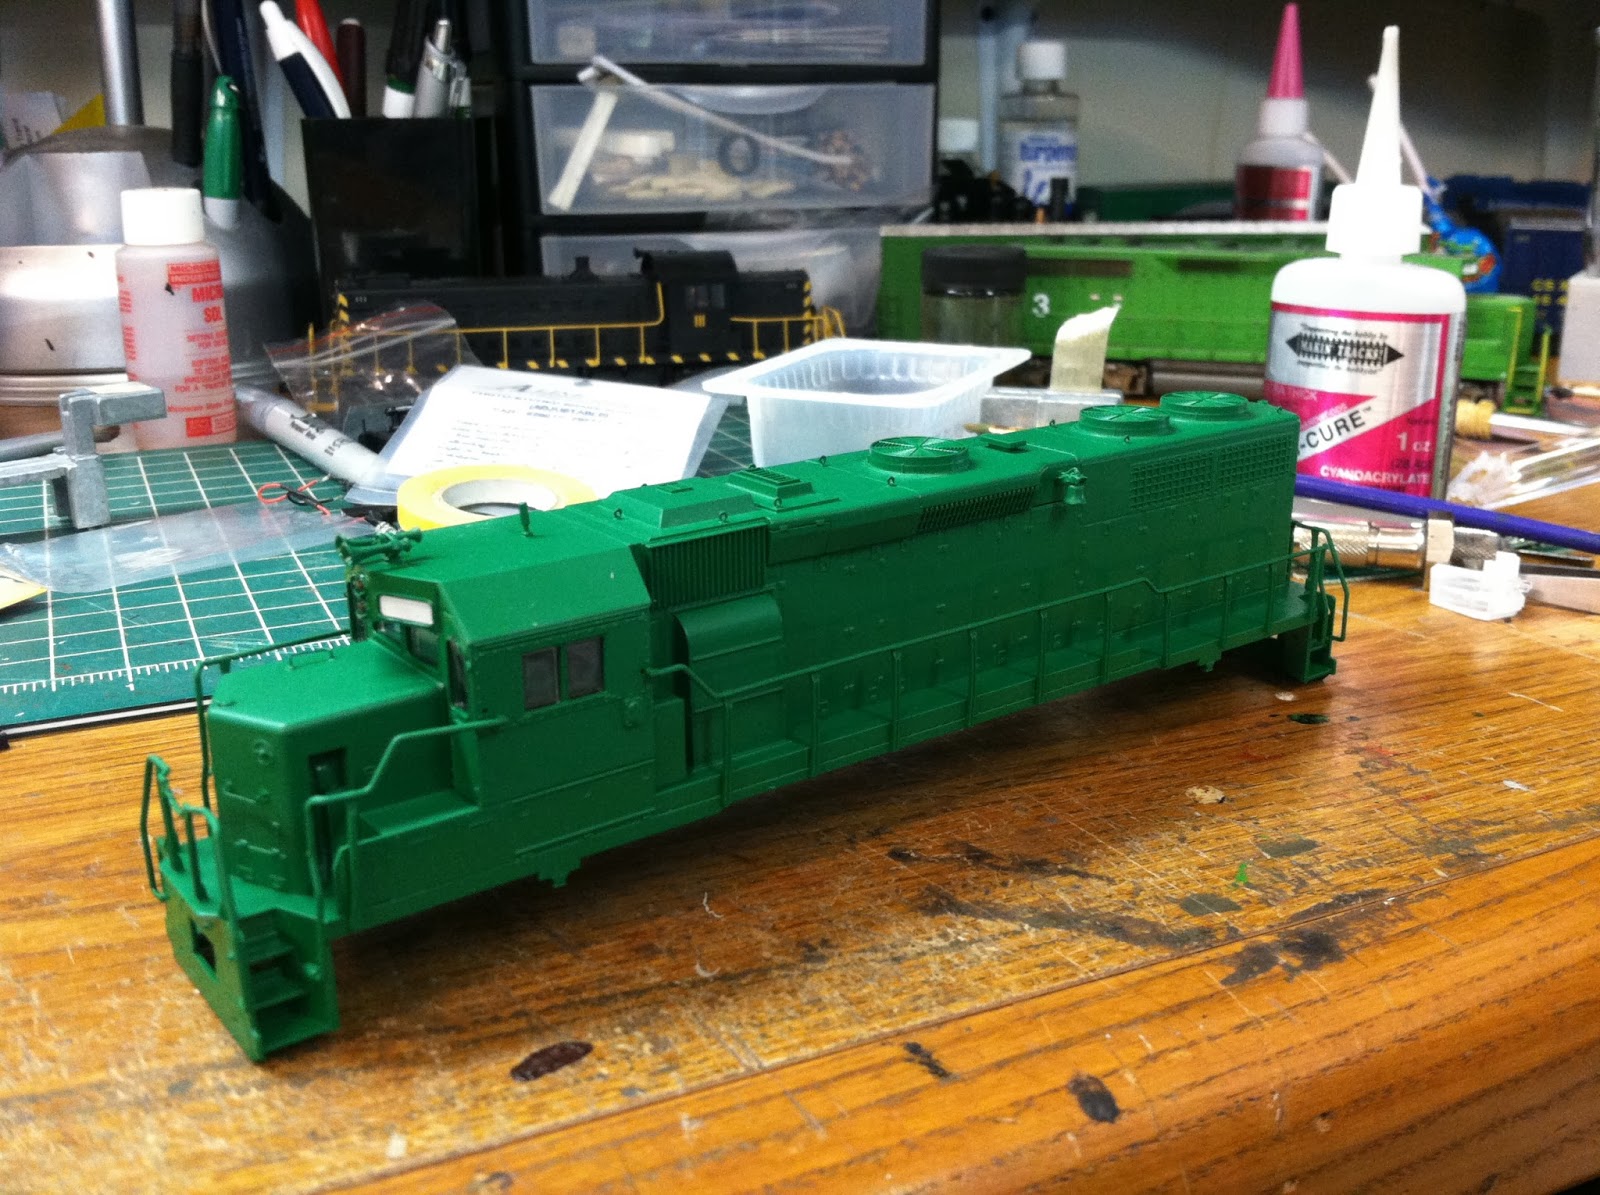
Well my Fall modeling is in full effect but I'm not really getting much done at the moment.  The MLB playoffs are in full swing, and as long as my Tigers are playing, modeling will take a back seat.  I have been meaning to update the blog lately and today I finally have some time.  I got a few things going on.  First, I finally got a picture in a model railroading magazine: Model Railroad Hobbyist.  I have picture of a B&O sand hopper  in the September issue in the "Yes it is a Model" section.  I was pretty happy with that.  The only modeling I have done lately is a new loco for the VM.  It's a Atlas Trainman GP39-2 phase 1.  I've been working on it for about 2 weeks, very slowly.  It's a new paint job and more of a dip job in green.  I like to have a few different schemes on the railroad and this would be the newest.  Instead of a Tsunami install, I bought my first LOK sound decoder.  All I can say is WOW!  It sounds great and motor control is great.  It sounds like a tsunami but a little better.  The pics below show my work.  The loco will have white hand railings and grab irons to break up the green some.
Pretty much a standard Atlas shell with out the grabs.  GP39-2 phase 1
My junky work desk.  Why is it your always working on a tiny space on the edge of the desk?

The Lok sound decoder is in the front and the VM #289 U23B Tsunami chassis in the back.  I'm adding a KA capacitor to the U23B.

Need to detail the hand railings with white and add a beacon and the snowplow.


One thing I was not looking forward to on this shell was drilling the grab iron holes.  MicroMark had a mini drill bit holder for drills.  So I tried it out.  Instead of breaking several #79 bits with a hand drill press and taking 30 minutes, I used this and broke none.  I was finished in less than 5 minutes!

Sunday, January 27, 2013

Soldering and signal frustration

Well after about a month or more of doing other things, I decided to install more signals on the layout.  This did not seem to be a long task but a tedious one.  My signals at the crossing have been put in for a few years now.  I installed them with on-off-on toggle switches.  I did the same with these.  These toggle switches have 6 connectors in the back to connect the correct wires.  I did myself a favor and ran the 2 main power wires all the way around the layout when I first thought about the project.  So that was done.  Those connect in the middle connectors on the switch.  Then the LEDs are on one (with the correct resistor) and the common is on the other.  Simple as that, right!  Solder them in and your done right!  Wrong! If the common and LED were switched connections, they would not work.  I found this out the hard way.  Soldering them in: not working, clip them in: working.  I went through toggle switches.  This was the obvious choice.  Went out and got some heavy duty ones like the other switches.  Then I found out about the common and LED thing.  Talk about frustrating.  I spent most of the day trying to get these to work!  The positive:  I did go several hours of soldering work without burning myself.

Soldering is something that if you are going to be in this hobby, you are going to have to learn.  It used to be painstaking but I found something that makes it so easy.  Tinning flux by Oatey is sold in Home Depot and other hardware stores.  Before this, my soldering was bad but this makes it so easy.  Put some on the end of the wire or connector and the solder bonds instantly.  No preheating!  I use and old soldering iron that has a little indention that holds my melted solder.  Works for me!  I use Micromark's Soldering Iron Stand instead of the little one that come with the iron. I use the same method on decoders and those expensive Tsunami decoders.

On with the progress:
My working (frustration) area above my desk.  The signals would control exiting of Battlefield yard.  Gator clips are great for testing connections.  Lots of tedious soldering work.
This is the larger signal that controls the VM out of Battlefield Yard.
Red signals coming out of the yard.  The one on the right is the RF&P connection that leads to hidden staging.  Need to lean it to the right some

Green Signal on the VM and an approach on the RF&P connector.  I wanted to wire the toggle to show a red over green or visa versa and it would not let me do that.  I'm sure you could but I could not figure it out.  I was happy they are lit!
Toggles are set and the fascia did not fit back even but that might be for another day!