Welcome!

This site is dedicated to my model railroad, the HO scale Virginia Midland Railroad. This layout comprises a 12X9 room with two levels. The upper level is complete and the lower level scenery has just begun.

I do a handful of train shows in the Virginia/Maryland region with Makin Tracks.
I also can help you find that freight car/locomotive or other hard to find item.

Email: virginiamidlandshops@gmail.com
You tube videos: http://www.youtube.com/user/Virginiamidlandrr/

Saturday, October 5, 2013

Fall modeling is a go (sort of)

Well my Fall modeling is in full effect but I'm not really getting much done at the moment.  The MLB playoffs are in full swing, and as long as my Tigers are playing, modeling will take a back seat.  I have been meaning to update the blog lately and today I finally have some time.  I got a few things going on.  First, I finally got a picture in a model railroading magazine: Model Railroad Hobbyist.  I have picture of a B&O sand hopper  in the September issue in the "Yes it is a Model" section.  I was pretty happy with that.  The only modeling I have done lately is a new loco for the VM.  It's a Atlas Trainman GP39-2 phase 1.  I've been working on it for about 2 weeks, very slowly.  It's a new paint job and more of a dip job in green.  I like to have a few different schemes on the railroad and this would be the newest.  Instead of a Tsunami install, I bought my first LOK sound decoder.  All I can say is WOW!  It sounds great and motor control is great.  It sounds like a tsunami but a little better.  The pics below show my work.  The loco will have white hand railings and grab irons to break up the green some.
Pretty much a standard Atlas shell with out the grabs.  GP39-2 phase 1
My junky work desk.  Why is it your always working on a tiny space on the edge of the desk?

The Lok sound decoder is in the front and the VM #289 U23B Tsunami chassis in the back.  I'm adding a KA capacitor to the U23B.

Need to detail the hand railings with white and add a beacon and the snowplow.


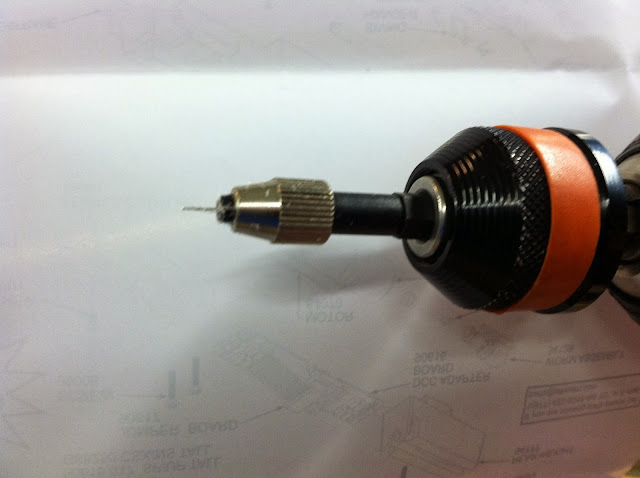
One thing I was not looking forward to on this shell was drilling the grab iron holes.  MicroMark had a mini drill bit holder for drills.  So I tried it out.  Instead of breaking several #79 bits with a hand drill press and taking 30 minutes, I used this and broke none.  I was finished in less than 5 minutes!

No comments:

Post a Comment