Welcome!

This site is dedicated to my model railroad, the HO scale Virginia Midland Railroad. This layout comprises a 12X9 room with two levels. The upper level is complete and the lower level scenery has just begun.

I do a handful of train shows in the Virginia/Maryland region with Makin Tracks.
I also can help you find that freight car/locomotive or other hard to find item.

Email: virginiamidlandshops@gmail.com
You tube videos: http://www.youtube.com/user/Virginiamidlandrr/

Sunday, February 23, 2014

Eye in the Sky

As you know I recently installed a helix in my garage.  I want somehow to watch it as the train made progress.  After a little research, I decided to get a security camera from Harbor Freight Tools.  This camera easily plugs into the video section of the TV I have in my office.  The cord is plenty longer and installation only took about 45 minutes.  I spent about $30 on it (using a 20% off coupon).  It does it's purpose and I am very thrilled so far.
Hardest part of the installation was installing the camera on the wall.


The helix in the garage with the camera watching overhead.
I watch DVD's occasionally on the this TV.

Closeup of the view.  I need to put the helix in a little better view of the camera.

VC #5:  She is a Kato GP35.  I recently put on a non-dynamic brake cover and covered the middle radiator fan.  Some kind of rebuild.  I was thinking a GP35R?

Sunday, February 16, 2014

Busy week on the lower level and a loco back from the dead

With Thursday and Friday off, it gave me the chance to get my room back in order and get away from the layout somewhat and finish a few projects on the desk.  I finally got my VMID U23B back on the tracks running well.  It had been sidelined with unreliability and made it a bad runner.  I could not fit a Keep Alive capacitor under the hood and thus made the U23B to sit on the desk for a while.  In some research for smaller speakers, discovered Apple I-phone 5 loudspeakers.  These speakers are small and sound great.  Getting 5 for $8 on Ebay is a good deal also.  I finally put one of those speakers in the cab of the U23B.  Yes, it's that small.  The #289 is running well and sounding great.  The #289 is special to me.  It's the first loco I installed a Tsunami in.  The Tsunami FDL GE sound is outstanding.

I also have all the track laid for the branch line on the lower level.  This section is directly below Battlefield Yard.  It serves a sand and gravel plant (Spur only) and a propane dealer.  The branch line will be named the Mine Run Branch and is actually a town name on the real Virginia Central Railroad.  There was no branch line there however.
VMID #289 ready to mix it up in Battlefield yard.  She's in original VMID paint.  One of the first locos I painted in VMID paint.
This will be Mine Run.  Don't know if I'll keep it in canal form but it looks good.  Probably will take out the dock.  A simple bridge here will complete the scene.

The look from the bridge to the propane dealer and the trackage back to the mainline. 
An overview of the scene.

Here's the trackage looking from the canal.  It has a run-around track for the hoppers returning to the loading facility.
Another view of the run-around track and spur.  The hoppers are sitting on the spur to the plant.

The end of the line and run-around track.  Lots of switching in this small area. 

Overview of the end of the branchline.

Thursday, February 13, 2014

Layout room facelift

Sorry that I have not posted in February yet.  I didn't realize it until I checked out the blog the other day.  I've put in some work on the lower level and now have started on the branch line.  I've also replaced my work desk with a smaller one and moved some things around.  This has taken some time to get organized and it's finally getting to the degree I want it to.  I was off today and did not get much done.  We got blanketed by that east coast snow storm.  It's our biggest snow since the 2009-10 winter.  We picked up just under 12" and it's snowing again now.  We missed another day of school today and I'm off again tomorrow.  We have missed 12 days this year!  I' cannot complain because I've gotten so much done on the layout.
After a good shoveling.  Our biggest snow in 4 years.
My new painting area.  It's part of the old desk and I just put a new top to extend an hold my test track.  Washes and paints are below.  I will have a cover so paint doesn't go on the bottles.
My smaller desk.  You can see the lower level right above it.  The hole in front of the loco goes to the helix.

New storage containers that hold my freight cars.  Also added shelving to hold shoe boxes and containers of model railroading supplies.
This is my newest trackage.  The train is on the mainline and the middle track is the branch line.  The hoppers are on the run-around track.  I decided to do a run-around to enhance operation.  The turnout on the left will lead a spur to another small industry. 

The track to Orange (west).  This turnout leads to the run-around track.  The industry will be in the background.

Another view of the trackage. 

Thursday, January 30, 2014

Lower level track laying and a custom car delivery

In my last post, I said I would have a post up by Sunday/Monday.  Well it's Thursday night and the post is finally here.  I had a sinus infection on Sunday and actually missed work on Monday.  So nothing got accomplished those two days.  Did get another snow day on Wednesday and got a little done that I had wanted to get done earlier on in the week.  The mainline is finished through the area I started on.  The mainline comes out from the helix and through the wall to the lower level.  It comes through a set of turnouts and continues to hidden trackage that leads west.
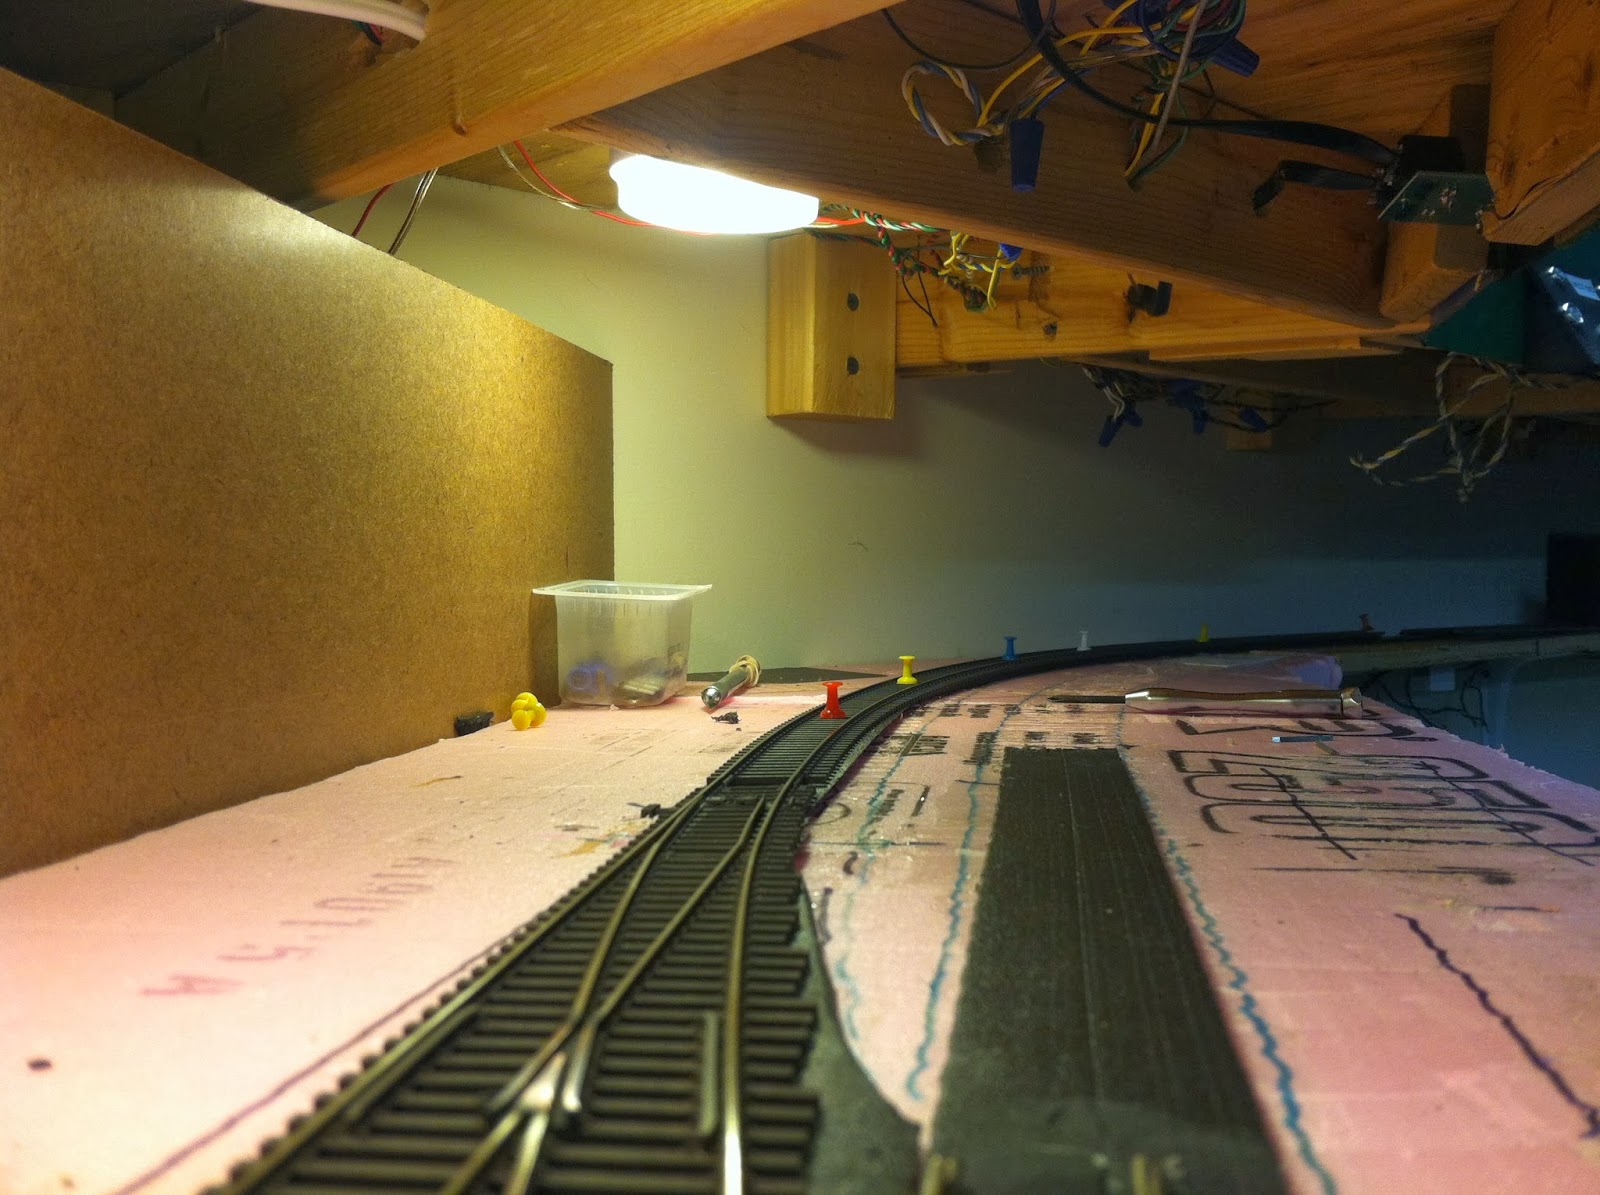
In this view, we are looking east towards the "hole in the wall".  The mainline is the trackage in the picture.  The roadbed on the right will lead to the branch line.

In this view, we see the hole to helix and the branch line trackage the bulkhead is on.  I will put a curved turnout where the foam starts for the runaround track for the branch line.

The mainline west.  There will be another turnout added for a runaround track for the branch line.   Tortoise switches were already installed for the On30 track.  I used the same basic layout I had so I did not have to move the Tortoises.

Norm Wolf did a custom MOW tie hopper for me.  He delivered it to me on Wednesday.  It's an Athearn blue box Ex SCL hopper.  Norm did a sensational job on it.

He even added a scrap tie load to the interior.

It will look right at home with my other MOW cars like the side dump car is coupled to.

Friday, January 24, 2014

Helix operational video

As promised, a video of the helix in operation.  I now have to get cracking on the lower level track.  I'll update with a post by Sunday.


Wednesday, January 22, 2014

Helix overload... But it's done!

Well it's complete!  Took me a few days but the helix is complete and runs well!  I hope it runs well throughout it's whole lifetime.  Knock on wood!  It was not the toughest thing I've done in model railroading just time consuming.  You cannot take any shortcuts because they will come back to haunt you.  Somethings to consider when building one:
  • A kit: the Ashlin Designs helix kit was a time saver and went together well.
  • Space: the helix is on a 5' high platform taking up a 6' by 7' space.  I did put shelves under it so I could store stuff. I can forget parking a car in the garage.  We never did.
  • Track: 15 pieces of flex track in the helix from level to level.  I used Atlas code 100.
  • Lumber: about $100 worth of lumber.  I did use MDF board for the platform
  • Time
 The next step is laying track on the lower level.  I got the day off tomorrow.  Hope to put a dent into it.

This is my flat lower level loop.  The helix lower level ends about 2 o'clock and has to run all the way to here.  The sliding doors are kept closed since it's about 45 in the garage.

Overall view from the garage steps.  Alot of work for 10 inches of drop! 

A view of the track doors to the layout.  Need some touch up paint and to level the lower door slide.


These finishing washers are perfect for holding track in staging areas.  I used them exclusively on the helix.

Access hole.  Standing on a stool I can access the helix for maintenance/cleaning.  I also can easily open the track doors.  They will stay closed when not using the helix.


Sunday, January 19, 2014

Helix platform construction Day One

I got started on the helix platform in the garage today.  It's a job in itself because the top of the platform is over 5 feet off the ground.  I had to build a decent frame for it.  They were not kidding when they say helix are a space hog.  This thing is about 7' by 6'.  A lot bigger than I wanted in the garage.  Guess it is too late to go back?  With the day off tomorrow, I hope to complete it.  I went to the Home Depot late last night for some lumber but had to return this afternoon for more lumber and screws.  I believe I might have to return again.  I'm using 2X3's for the frame and MDF 3/4" board for the top.  I will keep the middle open to observe/clean the helix.  Shelves will be under the helix size since I lost a ton of space in the garage.

The space I'll be working with.  The door leads to the layout now.

My office has some work done it too.  My work desk will be replaced with a smaller one.

Some beginnings of the framework.

Cameron helped me out a lot today.  Looks like I'm building a loft in the garage!

As far as I got tonight.  Should be able to finish tomorrow, I hope.