Welcome!

This site is dedicated to my model railroad, the HO scale Virginia Midland Railroad. This layout comprises a 12X9 room with two levels. The upper level is complete and the lower level scenery has just begun.

I do a handful of train shows in the Virginia/Maryland region with Makin Tracks.
I also can help you find that freight car/locomotive or other hard to find item.

Email: virginiamidlandshops@gmail.com
You tube videos: http://www.youtube.com/user/Virginiamidlandrr/

Wednesday, April 3, 2013

Weathered freight cars

Been doing some weathering on some freight cars in the last week and a half.  Been on Spring break this week but the railroad has not received as much attention as I would have liked.  Things like yard work and other house projects have taken up a lot of time.  Here is what I have got done.  A loco or freight car doesn't go on to the layout unless it has been weathered.  Just a pet peeve of mine!
Central of Chicago hopper.  A super detailed Accurail hopper.

RF&P gondola #3112 custom done using a Walthers gon.

Central of Chicago hopper #2.  Another super detailed Accurail hopper.

An Exactrail covered hopper.  Still got to put some scrapes and rust spots on that yellow paint.

This is a rare car I picked up at a show.  It's a Custom Finishes metal kit that turns out well.  Definitely a different car on the layout.

My 4th BB hopper.  I changed the number and tried to darken it as per the prototype.  The others were weathered too lightly.
On my Intermountain F3, I finally broke down and put a Tsunami in it.  I patched out the B&A on the sides and put the F&NN lettering on it.  I am not 100% sold on the font I chose.  The Fredericksburg and Northern Neck is a shortline that makes a occasional appearance on the layout.  They mainly bring a train in to Battlefield Yard from staging, drop their cars, pick up cars and leave.  Their line is not modeled on the layout and this fictional railroad would run the old RF&P Dahlgren Branch.
I put a Soundtraxx Tsunami in this F3 (former B&A) Still needs to weathered heavily.


Wednesday, March 20, 2013

Battlefield Yard update

Worked some over the weekend on the engine track at Battlefield yard.  This track is a engine/caboose "parking area" and where some minor maintenance can be done.  It has a small crew building here also.  I spruced up the area with weeds, grass and other items you typically would find at one of these places.  I also add some tan sand in the area so that the whole area does not like it's just ballast.

The sand adds a  better looking texture for the driven, worn areas.

There is still many thing s to add to the area but I believe I captured what I trying to convey.

I thought the open container door was a nice touch along with the 7up drink machine.  The bags of sand on the left are for the locos.
I'm also starting my busy season with work so post wont be as often.  So enjoy them when I do get the chance to post!  

Friday, March 8, 2013

Outside rebuilds for the Virginia Midland Shops

The Virginia Midland Shops is known for some outside rebuilds for area short lines but this week received two locomotives from the Michigan Interstate.  These two SD35's will rebuilt like the VM's lone SD20-2 but will be called SD22ECO.  The work will start this spring and run into the summer months.  When completed, both locos will be painted into the blue and yellow scheme for the Michigan Interstate.

RF&P GP40 #124 brings the MCIS locomotives into Battlefield Yard for an exchange to the VM.

The Michigan Interstate locos will then go to the Virginia Midland Shops (which is not shown on the layout) and have their rebuilds done.

Sunday, February 17, 2013

Industry tour #3: Patriot Industries

Continuing with my industry tour that I started last year, I decided to show you today, Patriot Industries.
Part 1: Klotz Distributors
Part 2: Specialized Beverage


Here's a short video of a train leaving some tanks at Patriot:
Leaving 2 tank cars at Patriot Industries

Patriot Industries is tucked into the corner of the layout and deals with mainly pool chemicals.  It receives tanks of chlorine and other chemicals.  The chemicals are then shipped by truck.  It's track can only hold 2 cars and it is  usually switched every operating session.
Overall view of Patriot Industries


Gates will be eventually added to the fence.  Klotz is to the left.

The scene to the right is still not developed yet. 
A chlorine tank car has been spotted in spot #1.

The storage tanks are at the very end of the building. 


Sunday, February 10, 2013

Battlefield Yard loco track

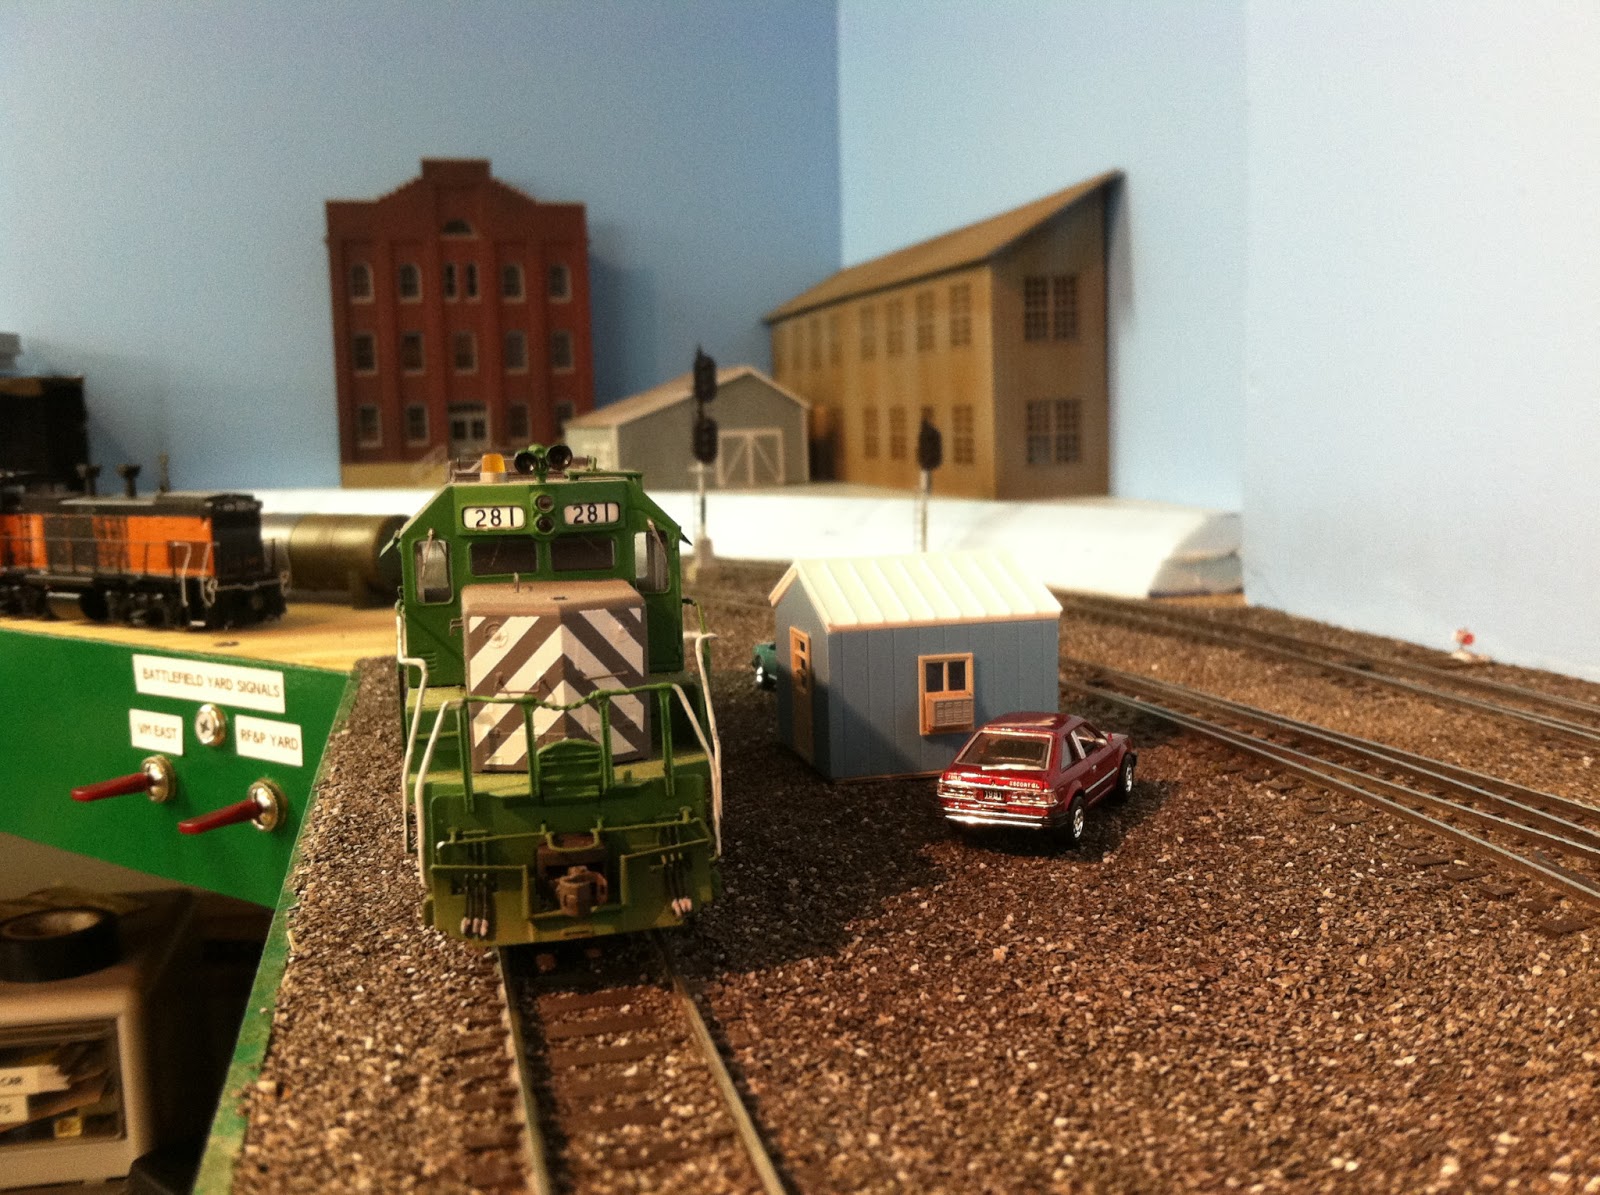
Got away from the On30 layout this week and worked on some scenery on the Midland.  I tried out my static grass applicator that I built from a electric flyswatter.  It works good but I never had static grass in the height I wanted .  I got some 6 mm in yellow and green and combined them.  I did a couple of patches on scenery that needed touch up.  No pics of this!  I did finishing ballasting the loco track off of the yard.  I put in a crossing and a small shanty for the crews.  I will put several more details to bring this area to life.  This area will represent a crew changing area and a general locomotive maintenance facility.
Wanted to go with something besides ballast but more than likely ballast would have been used.

The crew shanty with some "era" cars.  I will fill this area with lots maintenance related stuff.

VM #281 waits for her next assignment.

Wednesday, January 30, 2013

Short Video of my new signals


Here a little teaser video from my layout.  Not big fan of showing unfinished areas on videos by wanted to show that working signals do add a lot to a layout. 

Sunday, January 27, 2013

Soldering and signal frustration

Well after about a month or more of doing other things, I decided to install more signals on the layout.  This did not seem to be a long task but a tedious one.  My signals at the crossing have been put in for a few years now.  I installed them with on-off-on toggle switches.  I did the same with these.  These toggle switches have 6 connectors in the back to connect the correct wires.  I did myself a favor and ran the 2 main power wires all the way around the layout when I first thought about the project.  So that was done.  Those connect in the middle connectors on the switch.  Then the LEDs are on one (with the correct resistor) and the common is on the other.  Simple as that, right!  Solder them in and your done right!  Wrong! If the common and LED were switched connections, they would not work.  I found this out the hard way.  Soldering them in: not working, clip them in: working.  I went through toggle switches.  This was the obvious choice.  Went out and got some heavy duty ones like the other switches.  Then I found out about the common and LED thing.  Talk about frustrating.  I spent most of the day trying to get these to work!  The positive:  I did go several hours of soldering work without burning myself.

Soldering is something that if you are going to be in this hobby, you are going to have to learn.  It used to be painstaking but I found something that makes it so easy.  Tinning flux by Oatey is sold in Home Depot and other hardware stores.  Before this, my soldering was bad but this makes it so easy.  Put some on the end of the wire or connector and the solder bonds instantly.  No preheating!  I use and old soldering iron that has a little indention that holds my melted solder.  Works for me!  I use Micromark's Soldering Iron Stand instead of the little one that come with the iron. I use the same method on decoders and those expensive Tsunami decoders.

On with the progress:
My working (frustration) area above my desk.  The signals would control exiting of Battlefield yard.  Gator clips are great for testing connections.  Lots of tedious soldering work.
This is the larger signal that controls the VM out of Battlefield Yard.
Red signals coming out of the yard.  The one on the right is the RF&P connection that leads to hidden staging.  Need to lean it to the right some

Green Signal on the VM and an approach on the RF&P connector.  I wanted to wire the toggle to show a red over green or visa versa and it would not let me do that.  I'm sure you could but I could not figure it out.  I was happy they are lit!
Toggles are set and the fascia did not fit back even but that might be for another day!