Welcome!

This site is dedicated to my model railroad, the HO scale Virginia Midland Railroad. This layout comprises a 12X9 room with two levels. The upper level is complete and the lower level scenery has just begun.

I do a handful of train shows in the Virginia/Maryland region with Makin Tracks.
I also can help you find that freight car/locomotive or other hard to find item.

Email: virginiamidlandshops@gmail.com
You tube videos: http://www.youtube.com/user/Virginiamidlandrr/

Tuesday, July 24, 2012

Detailing RF&P Geeps Part 2

Last August I did a in depth article on how to detail RF&P GP40's and GP40-2's:
Detailing RF&P GP40's and GP40-2's Part 1


Towards the end I talked about the rear horns on the GP40's and GP40-2's.  Now, no retailer makes this particular horn.  So a scratchbuilt one will have to do!
Rear of #145 (Bill Griffin Collection)

Rear of GP40 #126 (Bill Griffin Collection)

Two GP40-2's tail to tail (Bill Griffin Collection)
I have done this horn a few different ways and it really stands out on the RF&P locomotive.  Recently, I found the better way possible to mount it, so it can be still attached to the locomotive.  The method is the same as in the first article but an small piece of wire was glued into the back of it.  I started by using a Atlas stock horn.  It's the horn that comes on the Atlas GP40's and GP40-2's.  You can order them from Atlas.   Cut the mounting tab (discard) and the lone rear chime off.  Glue the removed chime (or another chime from another horn) between the 2 remaining horns. You might want to drill a hole to glue the chime in.  It stays in place better.  Let this dry for a hour or so.  Then, below the chime you just added, take the smallest drill bit you have #79 for me, and drill a hole.  Insert a 1" piece of wire and glue.  The small wire will be what you insert into the loco to help the hold the air horn assemble stay in place.

Get some scrap styrafoam and insert and paint.  It's easier to do 2-3 at a time so you can equip your whole fleet!
From the above prototype pictures, It's a hard to see the middle chime, but it's there.

Put tape on the bottom of the foam so it does blow away when you paint it!
After it has dried, trim the wire with about a 1/4" remaining.  Drill a tiny hole in the rear of the locomotive slightly above the rear head lights.   Insert and glue.  

Friday, July 6, 2012

Tsunami alert

Got a chance to order a couple of Soundtraxx Tsunami decoders last week and just recently got them installed into the locomotives.  Both are Atlas locomotives and I have had plenty of experience with the Atlas ones.  They are also cheaper than the rest of the Tsunami decoders.  I found them at $74 each which is the best price I have seen.  Also if you have not experienced a Soundtraxx Tsunami, you just have too!  It seems that Soundtraxx is one of the few that offer sound samples on their website.  MRC sound decoders are affordable but where are the samples???

Check out the Tsunami samples:
Soundtraxx Tsunami Samples

The speaker is important and space is always an issue.  Railmaster Hobbies are the best speakers in the market.  They recently built a smaller speaker that is perfect for HO scale.  It's the  DS1436-8

Here is a link to their website:
Railmaster Hobby Speakers

Now the results:


RF&P GP40 #124 with a 645 turbo


VM C424 #292 with a Alco 251 V16


Stay COOL!!!

Wednesday, July 4, 2012

Historic Derecho and a new yard

What is the deal with the weird weather phenomenon here lately?  An earthquake in August, barely a winter and now a Derecho.  Now I knew what a derecho was before it was big news here this week.  I follow the weather closely and it is like a second hobby to me.  We got through without losing power for too long (only 15 minutes).  The family did hunker down in the bathroom for about 10 minutes.  I did lose a huge tree in the backyard.  Our neighbors around the corner were not so lucky.  They have been without power for the last 5 days.  Lots of damage in extreme northern Spotsylvania and the Mid-Atlantic region.  You be the judge:


Now for some model railroad stuff.  Finally got my small yard wired and installed.  It hold just enough cars to make it plausible.  Let the photos begin:
Looking down the yard.  It is a 4 track yard with 2 industry spurs.  One on bottom right and on the top left.

The beginning of the yard.  The far track goes to the RF&P railroad and track to the left goes to the VM and VC.

The diamond in the wall to hidden staging.  The closest track connects the older VM to the yard trackage. The RF&P trackage is on the top right.  The track on the top left is the VM into hidden staging.

Looking down the other end.  the RF&P will bring in about 6-7 cars on the left track.  The 2 middle track are classification tracks.  The VM will have a yard switcher stationed here.

The end on the yard.  Found a 3 way switch at a train show and it helps out since switching space is always a problem.  The track to the right is mainly a run-around track for the engines.  Well wanted to do a woodchip loading spur but the loader will not fit.  May turn this spur into a covered scrap loading spur.

Wednesday, June 13, 2012

Power pics

As the title suggests, It's time to dig out some of the Virginia Midland power and take some updated photos.
I'll let the photos do the talking:
VM #292 C424 has finally been weathered and is ready for service.

Finally completed RSS #7011 CF7.  I had to add the front stripes.  Still needs some weathering.

VM #281 is a SD20-2.  Has a Tsunami installed and is the only 6 axle power on the VM.

VM #200 is a GP11 rebuild.  It also has a Tsunami installed.

VM #278 is a SW1500B.  It is not slug but a powered unit without a cab.

VM #285 is a MP15DC with QSI sound.

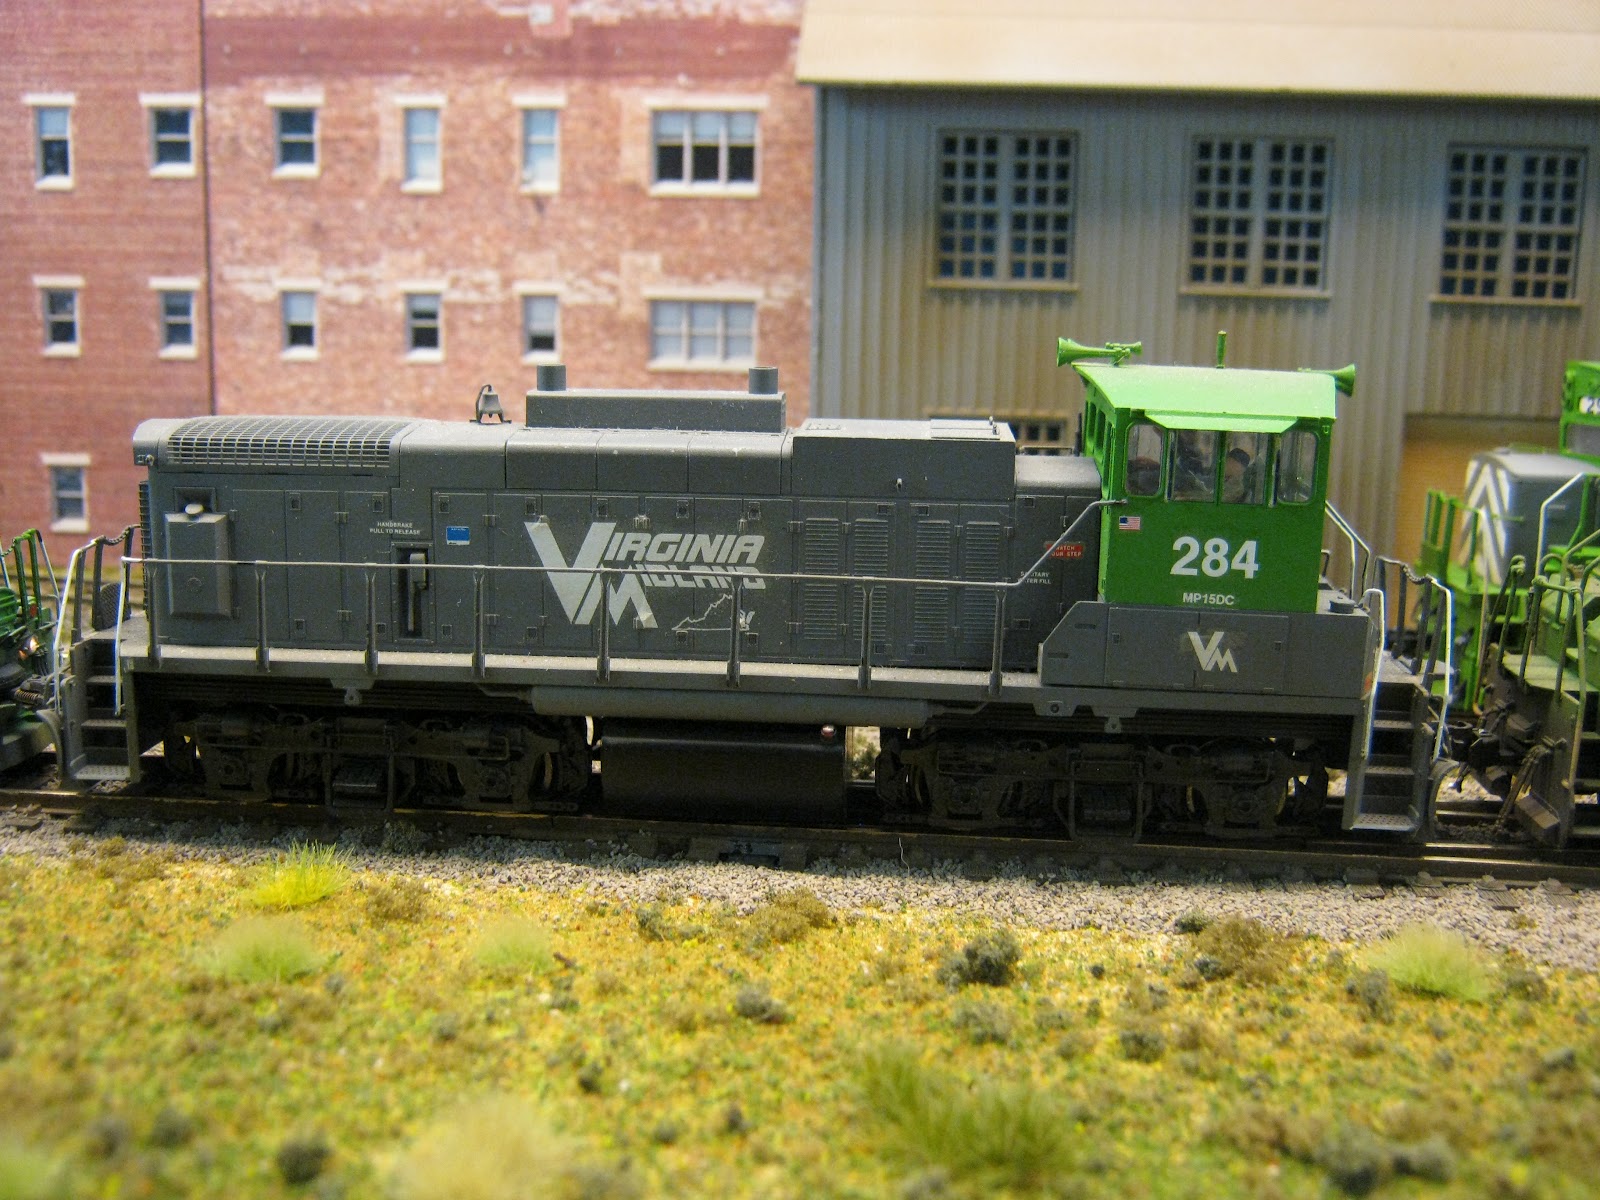
VM #284 is a MP15DC.

Saturday, May 12, 2012

New "older" power on the Virginia Midland

Like the Corn Flakes commercial " taste it again for the first time", I painted up some older power for the VM.  I'll admit that I am not a full fledge ALCOholic but they are great looking and sounding locomotives.  Usually this is my busy part of the year.  You tell that since I have not posted anything since the end of February.  With track season starting in the end of February, time for modeling is slim to none.  Well the season is coming to an end and I squeezed some time in and got this locomotive done.  I still have to weather it and she will be complete.  I plan on putting sound in it.  Of course the Tsunami sound decoder by Soundtraxx is by far the best decoders I have heard.  The Tsunami will make this loco come alive!  The C424 #292 is in the older VM scheme with Virginia Midland spelled out on the hoods.
VM #292 straight out of the paint shop.  She would be one of the original locos since it is in the original scheme.

VM #292 will work yard transfer jobs and the like.
 

Sunday, February 26, 2012

SCL Family Lines hopper

Finished a project I have always wanted to do.  Being near the former RF&P sub, I would always see FL and Seaboard System covered hoppers.  If you are a CSX modeler in the modern and even in their infancy you have to have lots of Family Lines freight cars with the  forgotten Seaboard System cars thrown in.  Intermountain finally produced a 4750 covered hopper in both Family Lines and Seaboard System.  So those are 2 cars I won't have to do.  So this leads me to the 4650 covered hoppers.   Intermountain and Atlas do produce the 4650 hoppers but not in Family lines or Seaboard System.  Now these are becoming rare to see, especially the Seaboard System ones, I used some Herald King decals and produced one a FL one.  I used the Atlas 4650 hopper.  The decals are for the open hoppers but they are close enough for the covered hopper.  I plan on doing a couple more.  This one has escaped the CSXT patch for now.

Monday, February 20, 2012

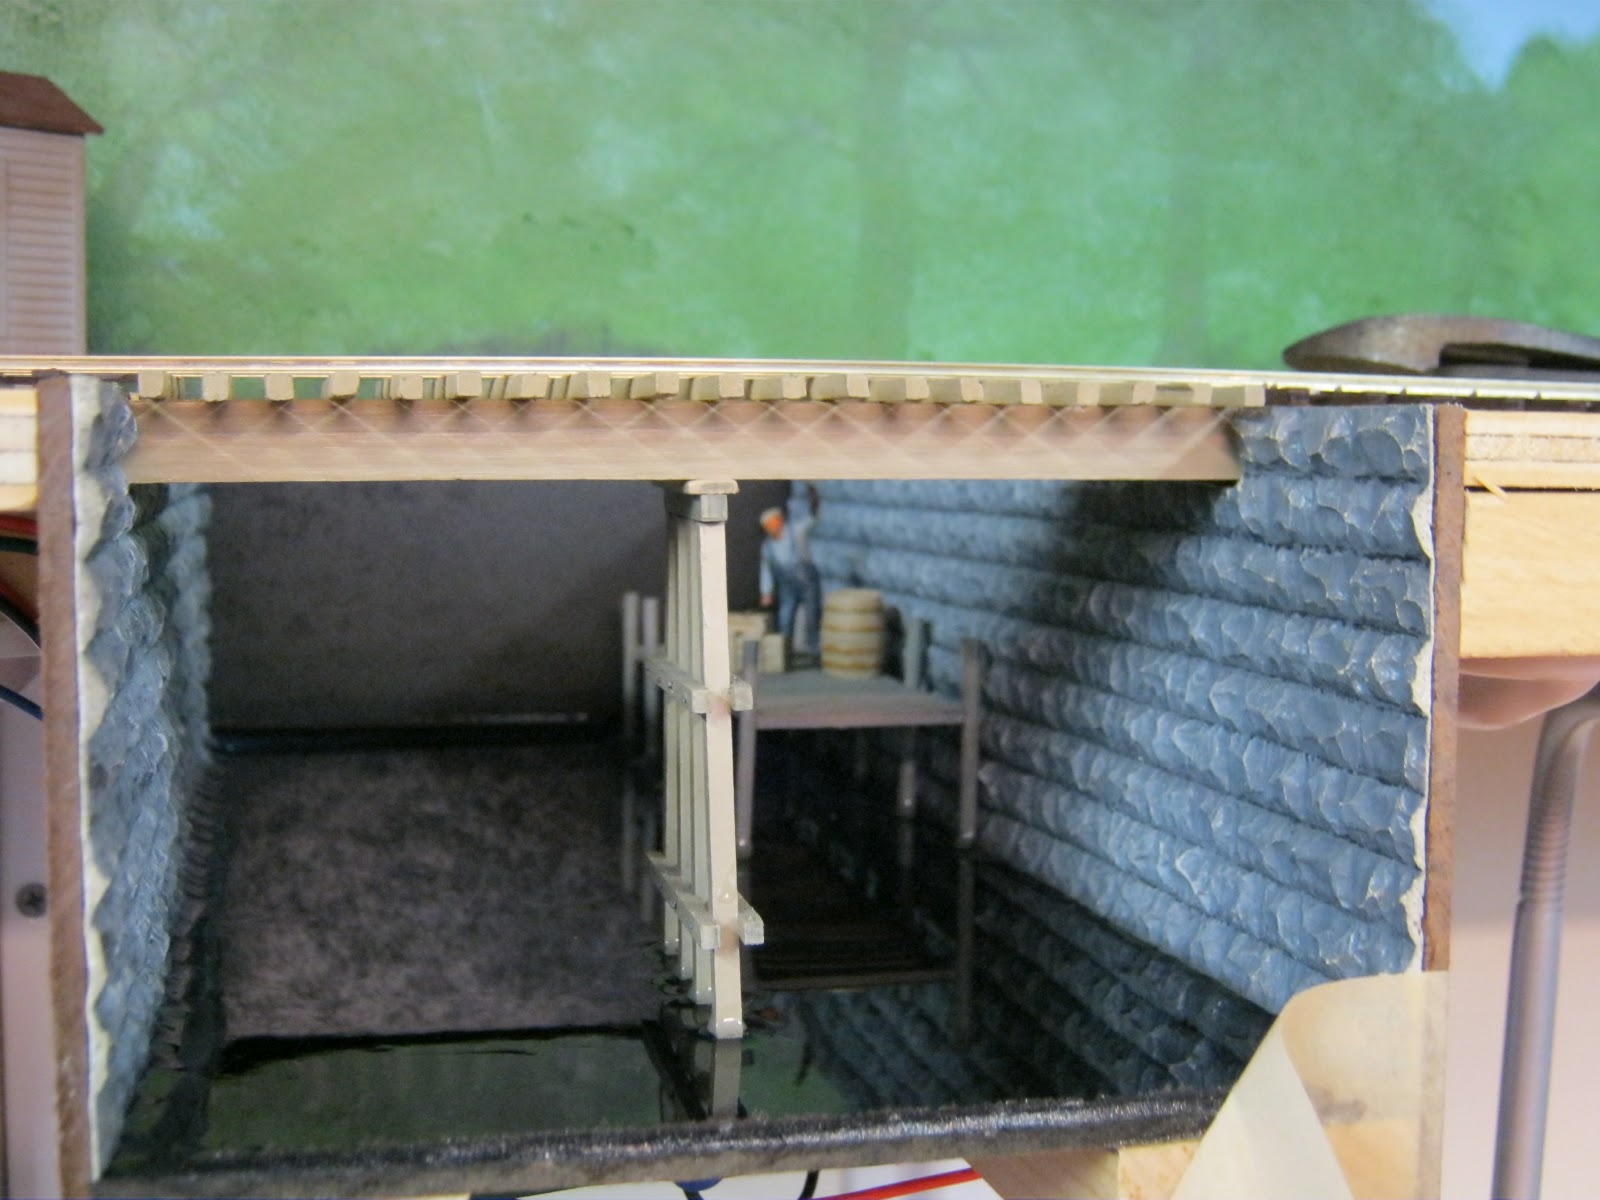
Work continues on the canal

Well added more "water" to the canal this long holiday weekend.  The Woodland Scenic realistic water is good and easy to use BUT make sure you have your cavity completely sealed before pouring.  I found out that the hard way.  The only good thing was the cavity was sealed after the first application.   You add about 1/8 of an inch per pouring until you get to the height you want.  I also scratch built the dock and added some details for now.  I need to build a ladder and add a jib crane for raising and lowering freight from the dock.  I also need to build a small barge for the canal.  No idea on how to start on that.